Do It Yourself: How To Check and Replace Motorcycle Brake Pads

Easy, cheap, and quick maintenance so your bike stops when you want it to

By Tricia Szulewski, Associate Editor

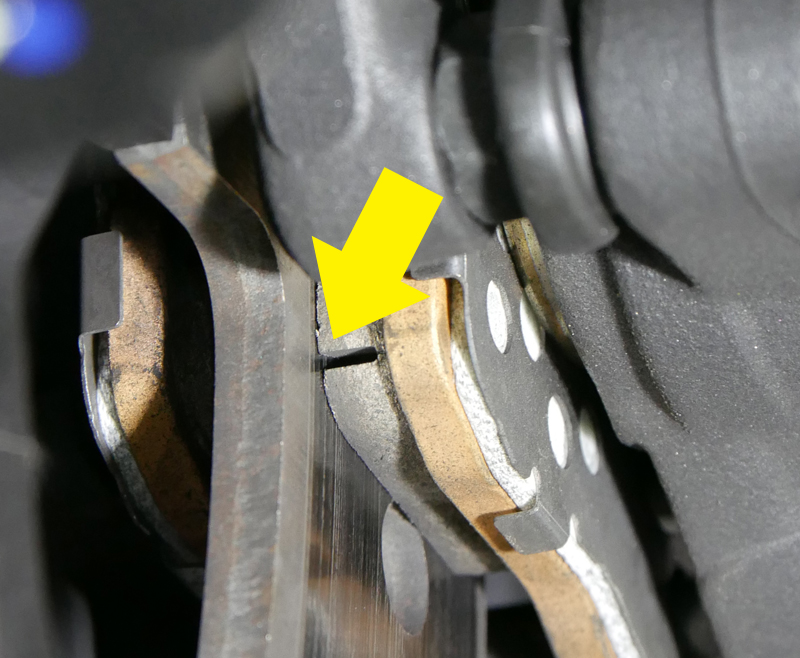
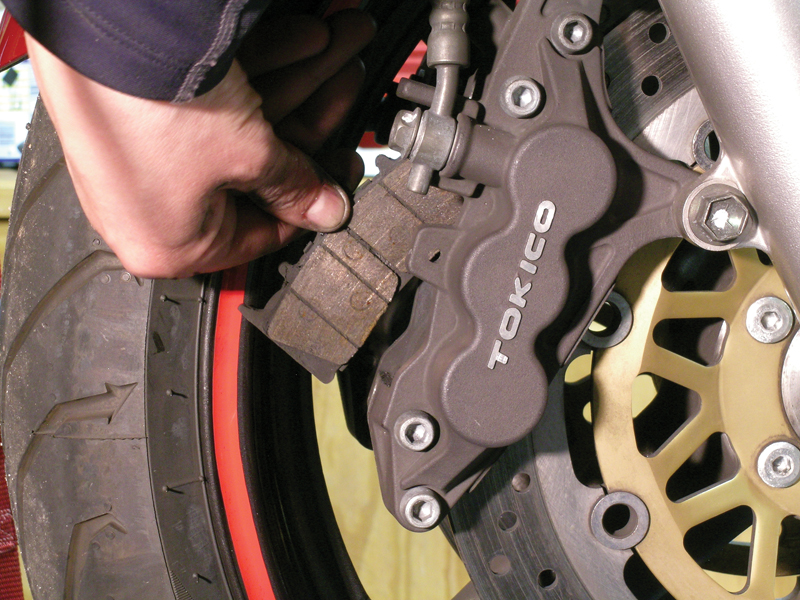
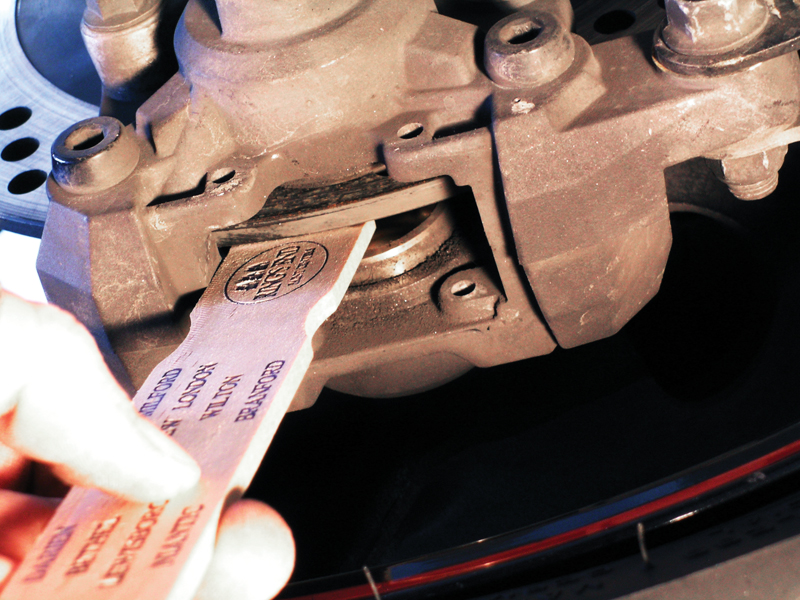
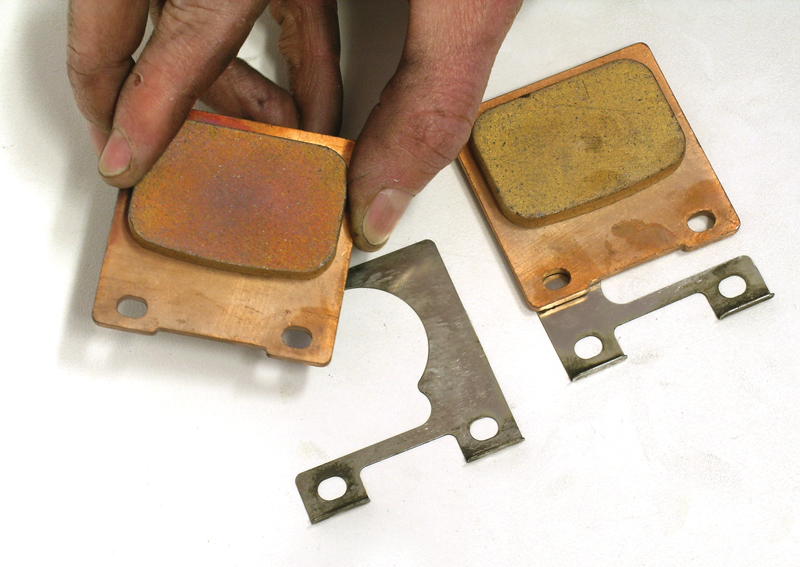
Our article on basic brake maintenance is a good overview of drum and disc system components, but if you want to go one step further, replacing worn disc brake pads is cheap, easy, and something you can do yourself. As always, check your motorcycle owner’s manual (M.O.M.) for information about how often you should check the wear on your brake pads and what is considered acceptable for continued use. My Suzuki Bandit’s manual suggests checking the pads every 3,700 miles. When the wear grooves are no longer visible, it’s time to replace them.

Do_It_Yourself_How_To_Check_Replace_Motorcycle_Brake_Pads
Many bikes like this Harley-Davidson Sportster Iron 1200 have wear indicator grooves that you can easily see. If the brake pad is worn so much that you no longer see a groove they need to be replaced.

Women Riders Now E-Newsletter

Stay up-to-date on all things motorcycle! Latest gear, bikes, and product reviews. Travel ideas, great product giveaways, and more.

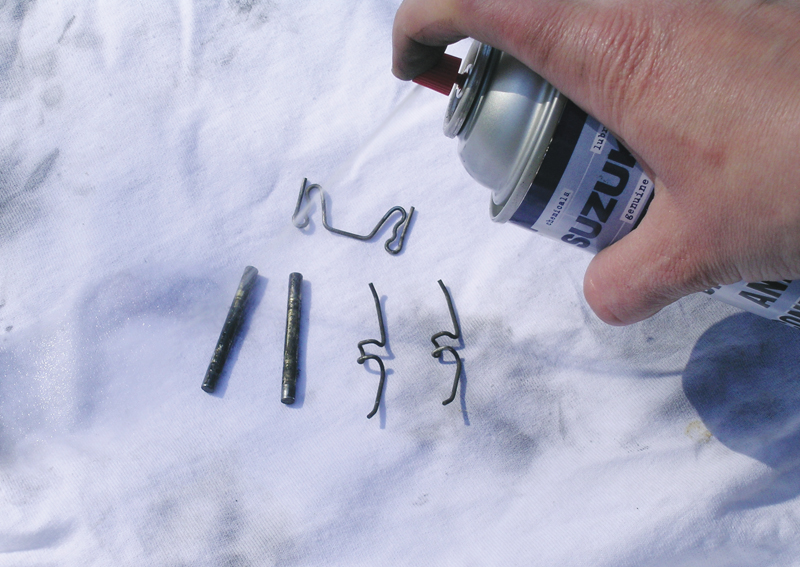
For those who want the satisfaction that goes with working on your own motorcycle, replacing disc brake pads is a relatively easy job you can do in your own garage. You don’t need many tools, but you will get dirty. You’ll want to have some brake cleaner and rags on hand to clean up all the brake dust that gets on the components, but don’t let it get anywhere near your tires or painted parts.

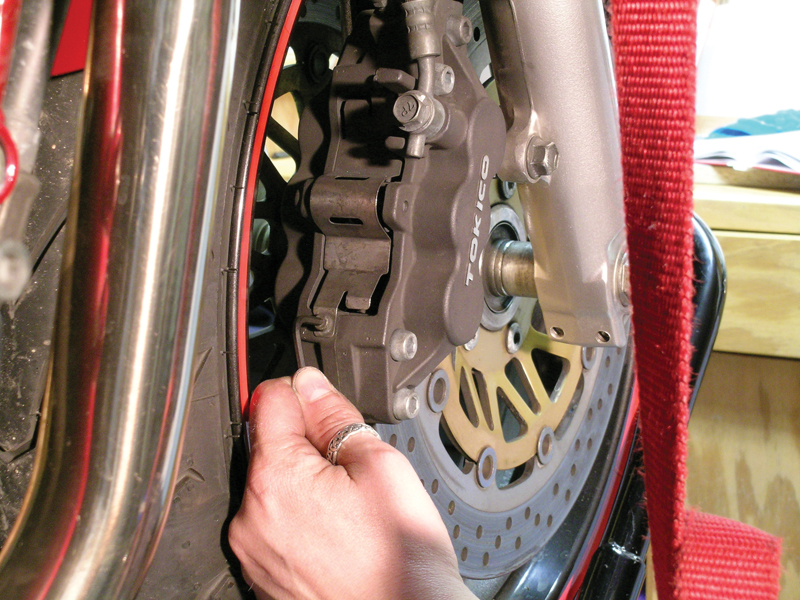
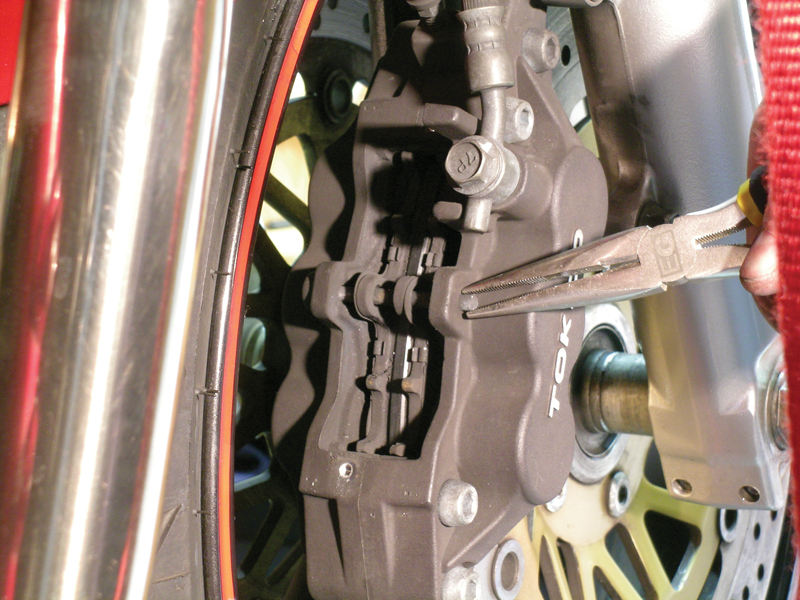
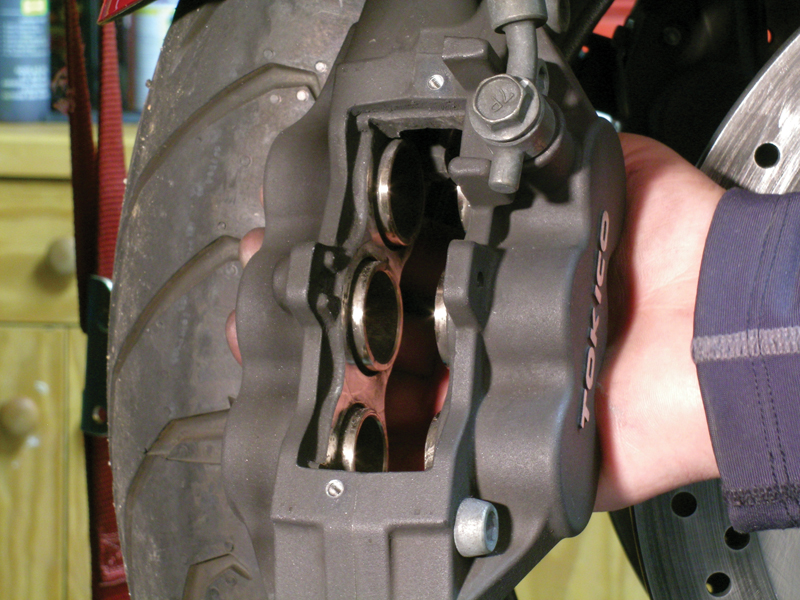
My Bandit has two calipers and rotors for front stopping power and a single caliper and rotor on the rear. The steps are the same for each, however, the mechanism that holds the brake pads in the calipers are slightly different. The following steps show how I replace the brake pads on my bike. Your bike may be slightly different, but this gives you an idea of the complexity of this type of DIY job. It’s always handy to have a maintenance manual for your bike to refer to if you are unsure about your motorcycle’s parts or how to do a job like this.

Do_It_Yourself_How_To_Check_Replace_Motorcycle_Brake_Pads_New
When choosing new brake pads, there are options other than going with a direct OEM replacement. I chose to upgrade my pads to DP Brakes’ sintered pads with a high friction rating designed for sport bikes. These cost about $40 for each pair.
Do_It_Yourself_How_To_Check_Replace_Motorcycle_Brake_Pads_Front_Caliper
I begin by unscrewing the Allen bolt that holds a metal plate on the front caliper that covers the brake pads.

Do_It_Yourself_How_To_Check_Replace_Motorcycle_Brake_Pads_Clip
I use needle nose pliers to remove the pad spring retaining clip.
Do_It_Yourself_How_To_Check_Replace_Motorcycle_Brake_Pads_Split_Pin
Then I pull out the split pin.
Do_It_Yourself_How_To_Check_Replace_Motorcycle_Brake_Pads_Worn
Now I can remove the worn brake pads.
Do_It_Yourself_How_To_Check_Replace_Motorcycle_Brake_Pads_Clean
I use a wire brush and a heavy dose of brake cleaner to clean the pins and clips.

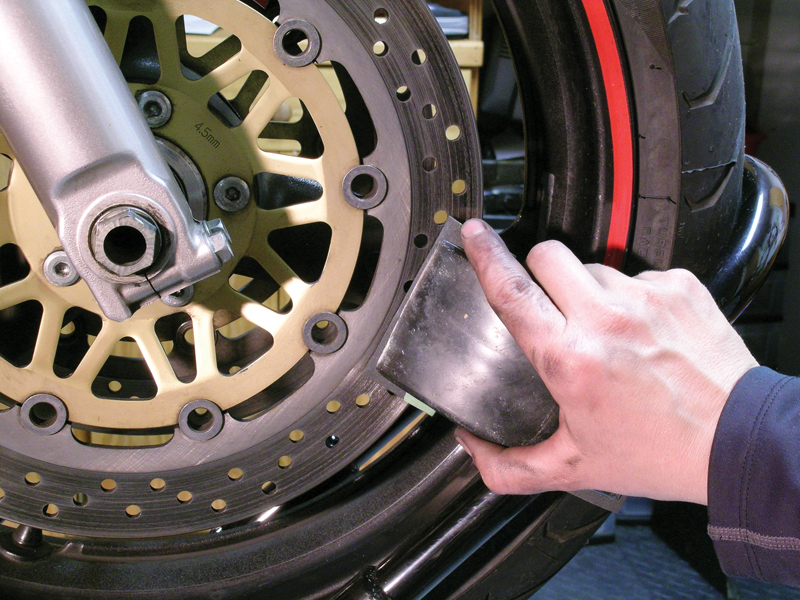
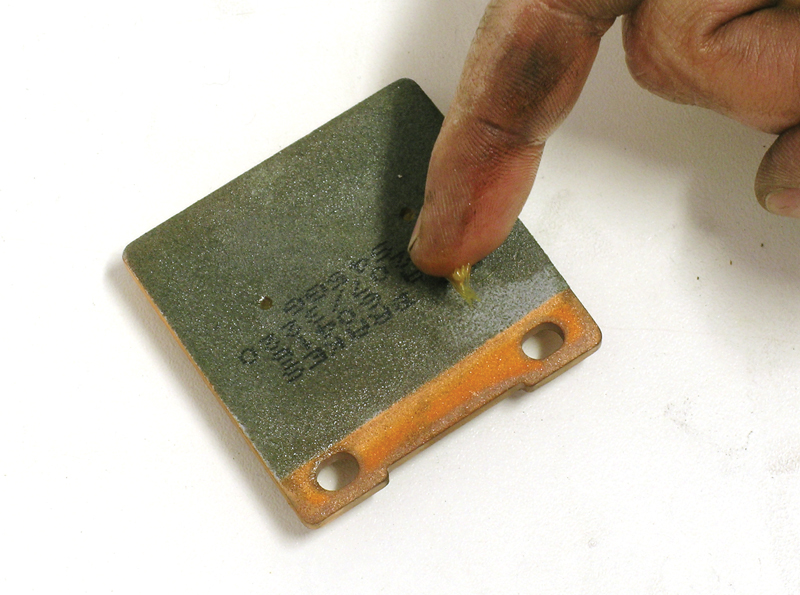
It’s recommended to either resurface the brake discs or replace them at the same time as brake pad replacement. If you reuse a worn disc without resurfacing it, the grooves prevent the new pad from making full contact with the disc, thereby limiting the friction used for braking.

Do_It_Yourself_How_To_Check_Replace_Motorcycle_Brake_Pads_Disc
A fine grade sandpaper can be used to sand down any deep grooves in the disc. Be sure that the disc is thick enough to meet the bike’s specs after sanding. If it’s not, you’ll need to replace it.
Do_It_Yourself_How_To_Check_Replace_Motorcycle_Brake_Pads_Clearance
Next, I work a wooden paint stirrer wedged between the caliper pistons and the disc to open them up as much as possible. (This is the Bandit’s rear caliper.) This step is necessary in order to create enough clearance for the new, thicker pads.
Do_It_Yourself_How_To_Check_Replace_Motorcycle_Brake_Pads_Inside_Caliper
Here, I’ve removed the front caliper for a better view of the inside of the caliper with the pads removed and the pistons pushed as open as wide as possible.
Do_It_Yourself_How_To_Check_Replace_Motorcycle_Brake_Pads_Grease
Next I smear the backs of the new pads and the shank of the pad pin with some copper-based grease.

Do_It_Yourself_How_To_Check_Replace_Motorcycle_Brake_Pads_Install
Then the DP Brakes front brake pads get inserted into the caliper with the friction side facing the brake disc. I reinsert the pin through the holes in the pads, and reinstall the retaining clip.
Do_It_Yourself_How_To_Check_Replace_Motorcycle_Brake_Pads_Cover
The front caliper’s metal cover is reinstalled to finish the job on the front.
Do_It_Yourself_How_To_Check_Replace_Motorcycle_Brake_Pads_Rear
The rear pad removal and installation is almost the same, but these pads have anti-chatter shims.
Do_It_Yourself_How_To_Check_Replace_Motorcycle_Brake_Pads_Rear_Clips
The clips that hold the pads in the caliper are also a little different.

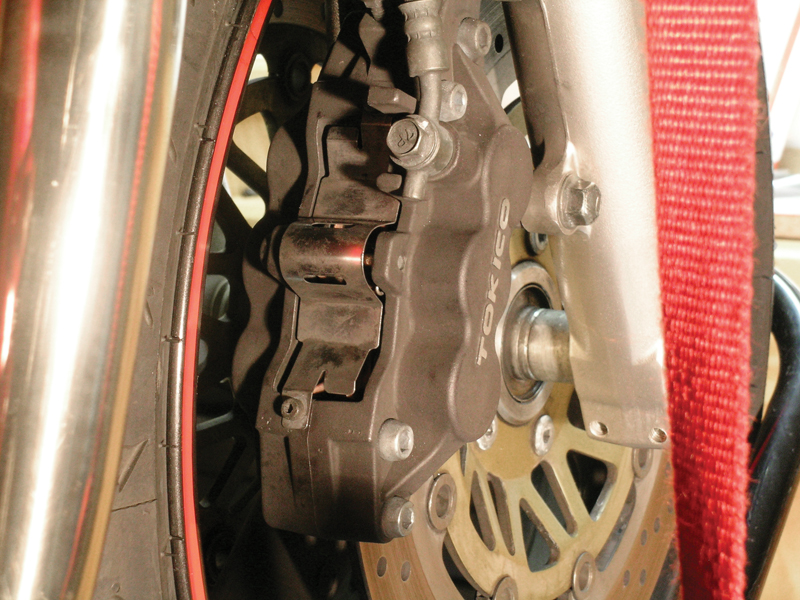
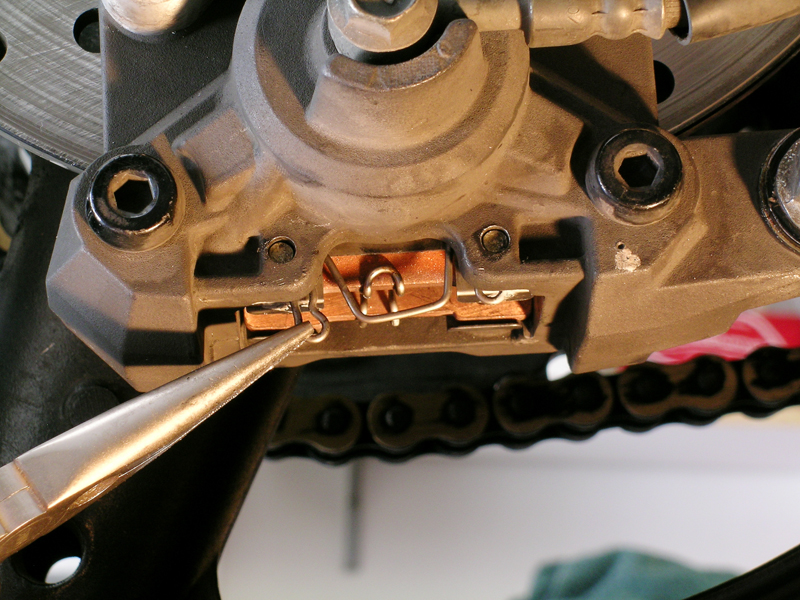
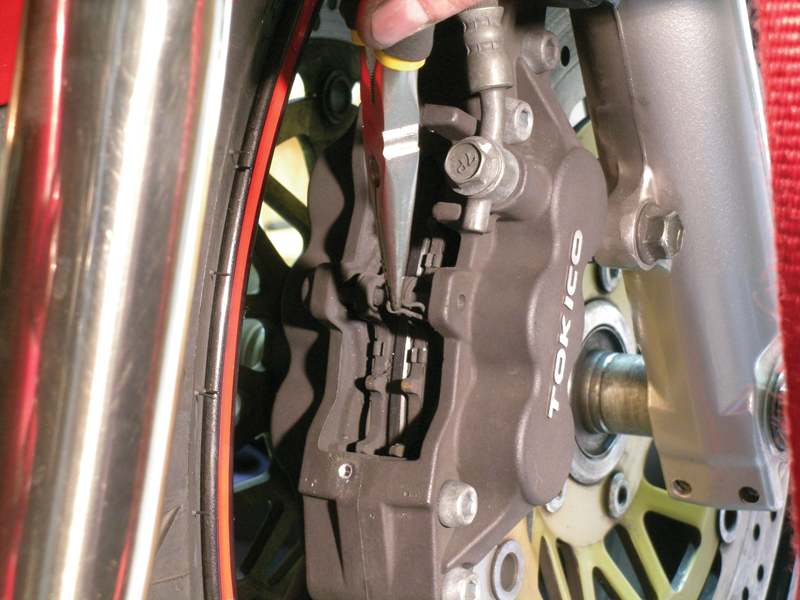
When doing a replacement installation like this, note the order in which you removed parts so that you can just reinstall them in the opposite order. It helps to start with a clean work area and just lay out the parts as you remove them. This makes reinstalling them much easier to do later on.

Do_It_Yourself_How_To_Check_Replace_Motorcycle_Brake_Pads_Finish
The last part of the new brake pad installation is to top off the master cylinder reservoirs if necessary and operate the brake lever and pedal several times to bring the pads into contact with the discs.

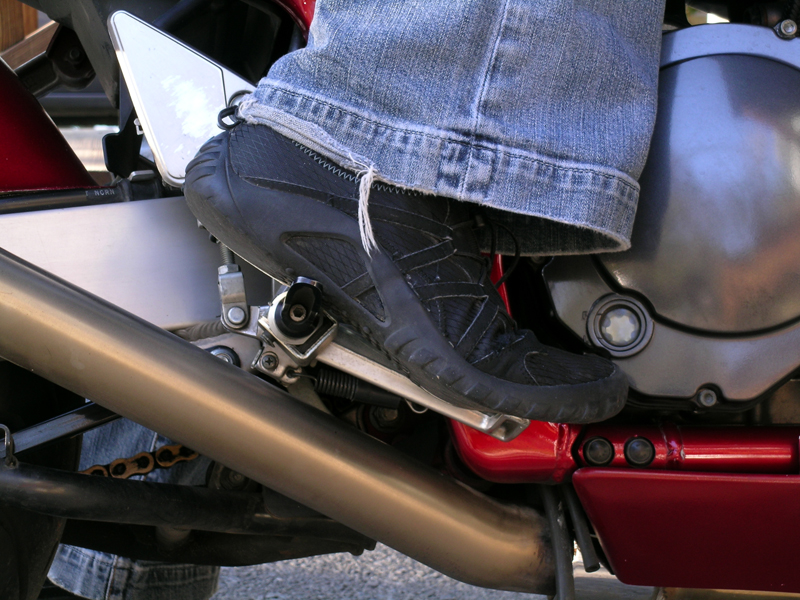
After you’ve installed new brake pads, you’ll want to break them in gently. Avoid stopping quickly and suddenly for the first few rides so the new pads have a chance to get seated and broken in properly. Go for an easy test ride and if you have any doubts about your workmanship, have your technician check your bike.

Related Articles
Know Your Motorcycle: Brakes Maintenance 101
Riding Right: Stop!
Setting Up Your Motorcycle Garage
More Do It Yourself Articles

2 thoughts on Do It Yourself: How To Check and Replace Motorcycle Brake Pads

  1. I love, love, love your maintenance articles! Excellent photos. Often, women rider sites and magazines leave out the mechanics. This also helps one to know her bike much more intimately and troubleshoot potential problems out on the road. Thanks Tricia and WRN!

    1. Thanks for the wonderful feedback, Julie!Let us know what you’ve done to your bike, too, from basic maintenance to installing accessories, we’d love to share a pic of you and your ride in our “Your Motorcycles” section. Here’s how to submit.

Scroll to Top