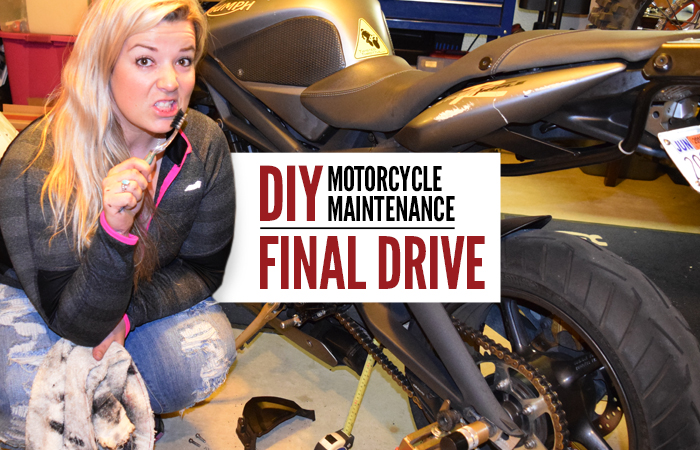
Your motorcycles final drive is what connects power from the engine to the rear wheel to make it go. Sound important? Well it is! Whether your bike has a chain, belt, or shaft drive, its working hard while you get to enjoy the wind in your face. So keeping it well maintained will keep you on the road longer. As always, consult your motorcycle owners manual (M.O.M.) to find out how often you should be performing these checks and services on your motorcycle.
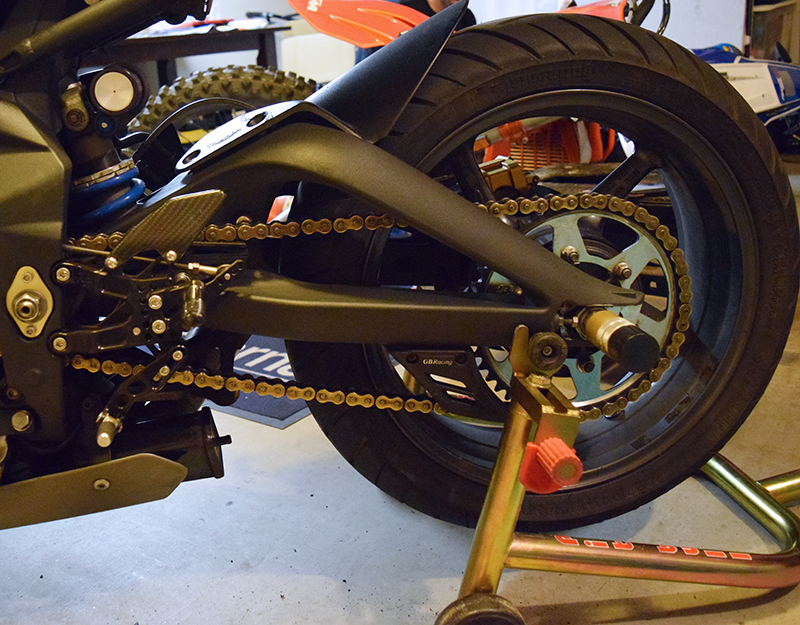
Chain Drive
If your motorcycle has a chain final drive, it probably has an O-ring or X-ring roller chain. While the rubber rings are internally lubricated, you still need to keep them clean and externally lubricated. And its important to make sure the chain has the proper amount of slack; you dont want it too tight or too loose, as riding for long in this condition will affect the bikes performance and wear the chain and sprockets out much faster.
How to Check/Inspect (Every 800-1000 miles)
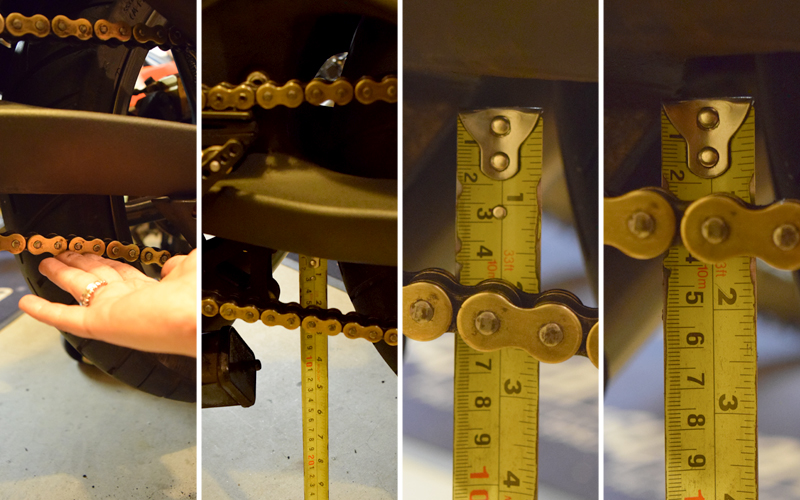
Youll want a new set of chain and sprockets if you can pull the chain off the back of the rear sprocket with your hand to expose half the tooth. When it comes to your sprockets, watch out for hooked teeth, sometimes called shark teeth. This looks like saw blades and the curve is noticeable. If you have a curve on one side of each sprocket tooth, it’s time to replace everything. These two red flag signs only happen when you neglect your chain maintenance, so be diligent and it will pay off in the long run.
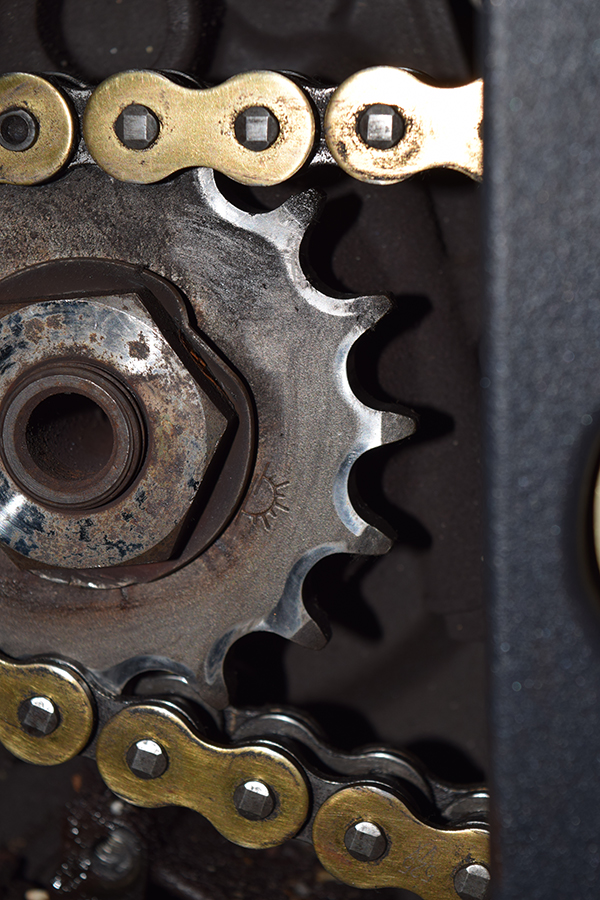
Always replace both sprockets and chain at the same time; never change just one piece of this important drivetrain puzzle.
How to Maintain and When to Replace
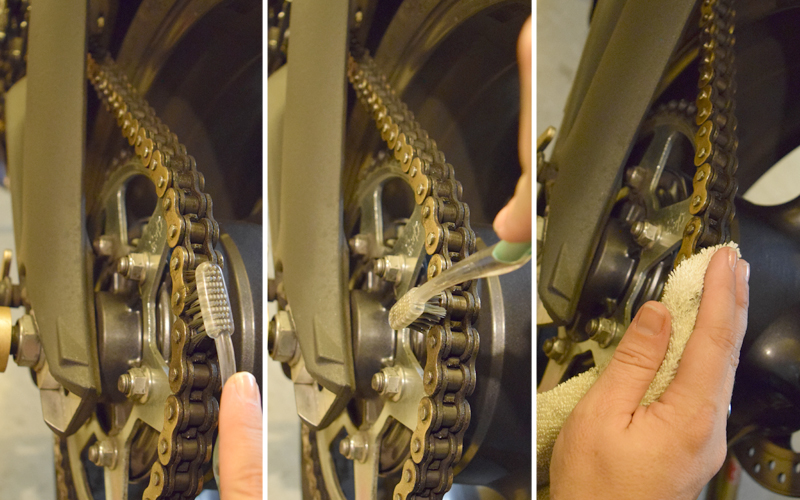
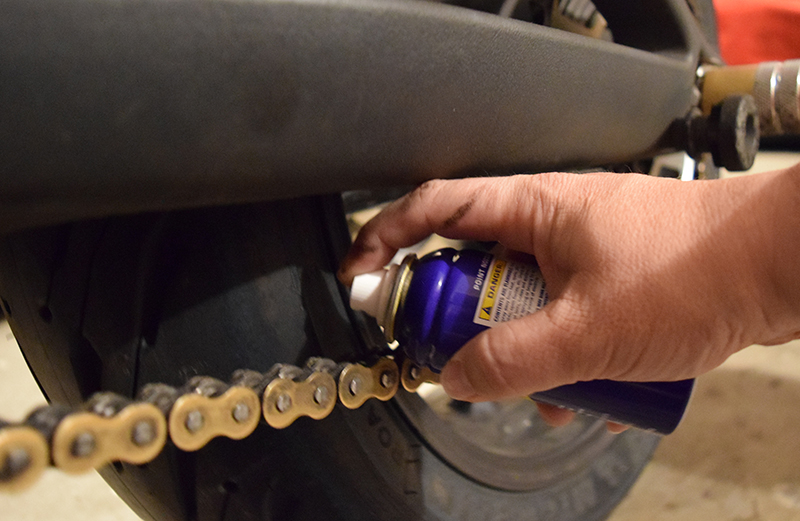
The mood might not be perfect, but we suggest the following maintenance after a ride while the chain is still warm. Be careful, your chain will be hot immediately after a ride, but a warm chain is easier to clean and disperses wax-based lubricant the best. If you spray lube on your bikes chain right before a ride, be prepared for most of it to end up on your leg, wheel, and chain guard.
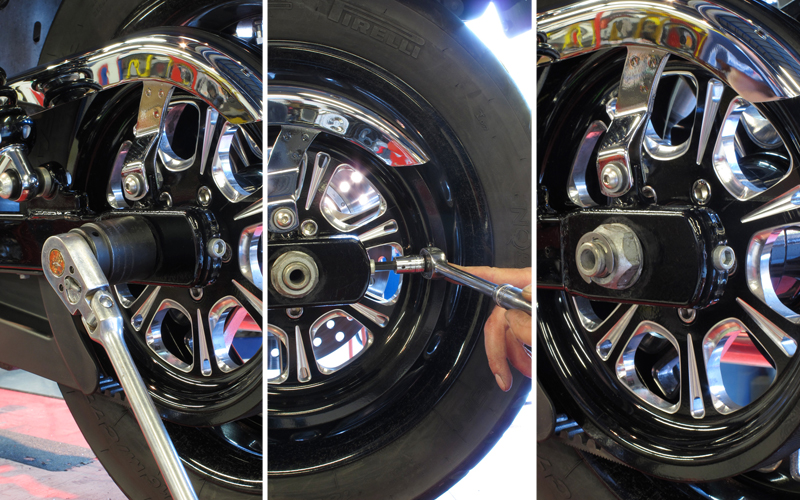
To adjust the chain, do the following steps:
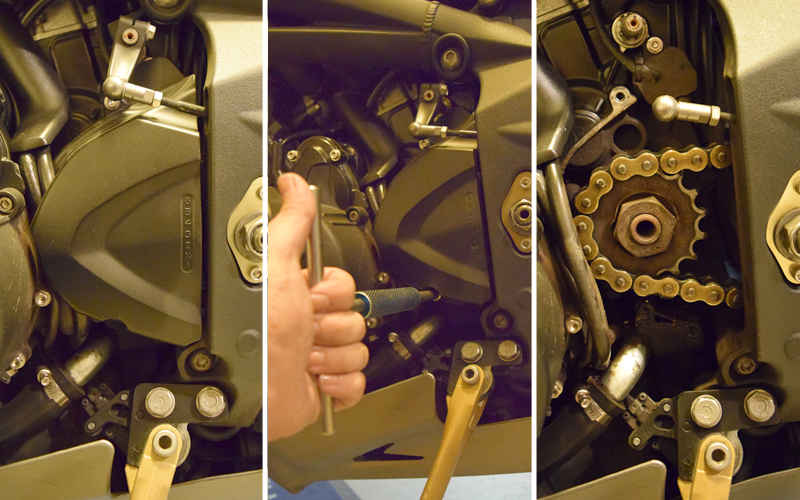
1. Loosen or remove your exhaust/muffler if needed to access the tensioner nut or axle nut.
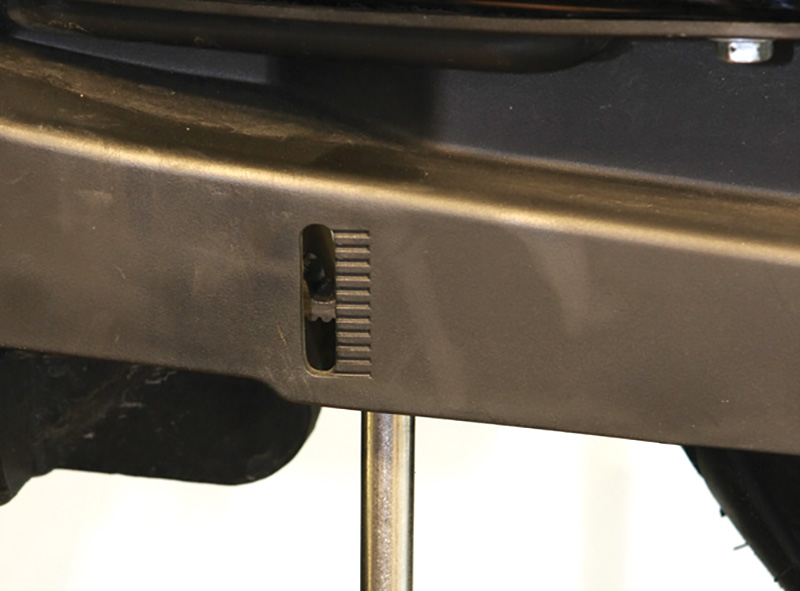
2. Count the notches in the tensioner or on the swingarm on each side to make sure they match exactly. This is a great way to check wheel alignment before you begin your adjustment.
3. Loosen the rear axle.
4. Loosen the jam nut on the chain tensioner.
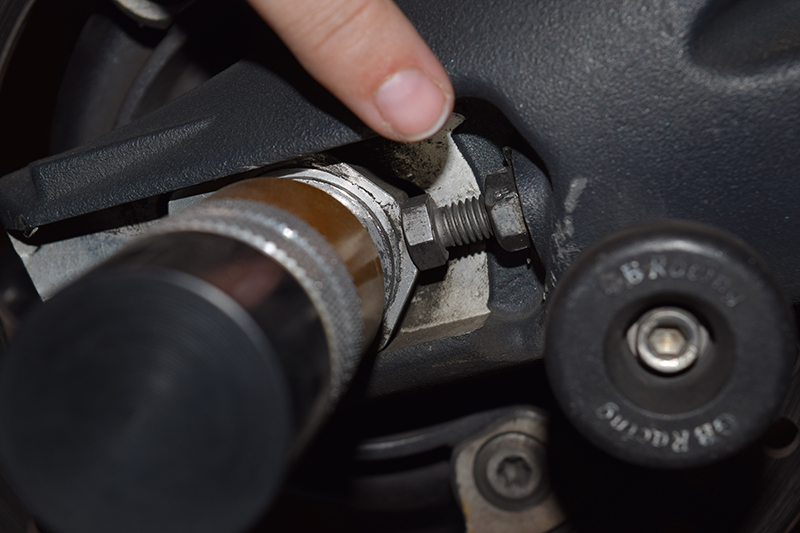
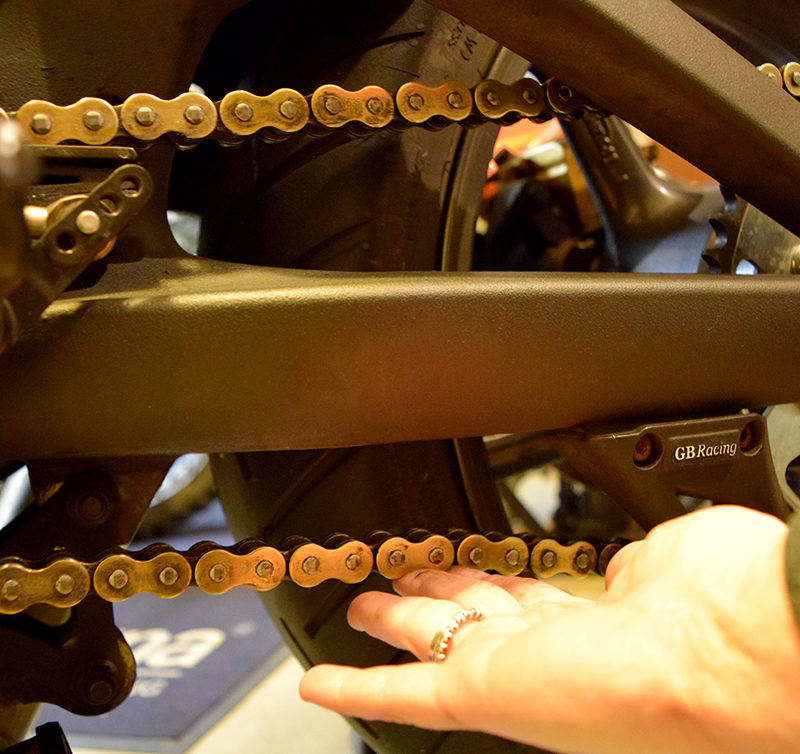
5. Turn the chain adjuster bolts (shown in photo above) 1/8 of a turn at a time on each side until correct tension is reached (moving the axle forward to loosen, backward to tighten). Remember, M.O.M. knows all, so follow her specs on proper chain tension.
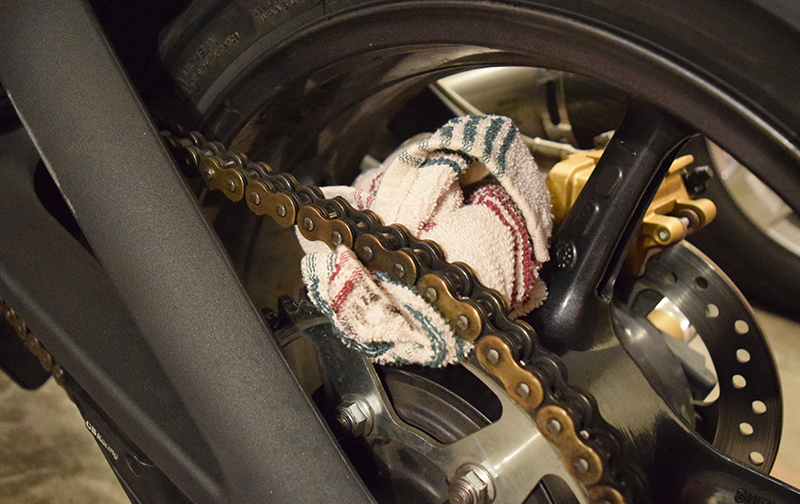
6. Super-helpful tip: Put a shop towel between the chain and rear sprocket and rotate the rear wheel backwards until tension is felt (because the towel gets stuck in the sprocket teeth). This forces the axle forward in the swingarm and almost always auto aligns the chain tensioners and keeps them properly seated. Visually check that the chain tensioners are still in the same position.
7. While holding the tension (from step 6) on the rear wheel, tighten the axle to M.O.M.’s specified torque.
8. Rotate the wheel forward and remove the towel.
9. Double-check chain slack to ensure a proper adjustment.
10. Once proper adjustment is verified, tighten the jam nuts. Voila!
Your bike’s chain could very well be that noise gremlin you’ve been chasing for a week. A very loose chain can make a loud clicking or clacking noise, where a chain that is too tight can make a whirring noise.
Belt Drive
Belt drives are much cleaner than chains and require less regular maintenance, but shouldnt be ignored completely. Make sure to check with M.O.M. on whether your bike’s tension specs are based on your bike being on the ground or lifted (some have specs for both). Set your motorcycle up accordingly before doing the following maintenance.
How to Check/Inspect (Every 2,500-5,000 miles)
Visually inspect the entire belt for road debris, small tears, dry rot, or significant wear. Check the teeth on the pulleys—they should last the life of the motorcycle but a visual inspection for significant damage is never a bad idea.
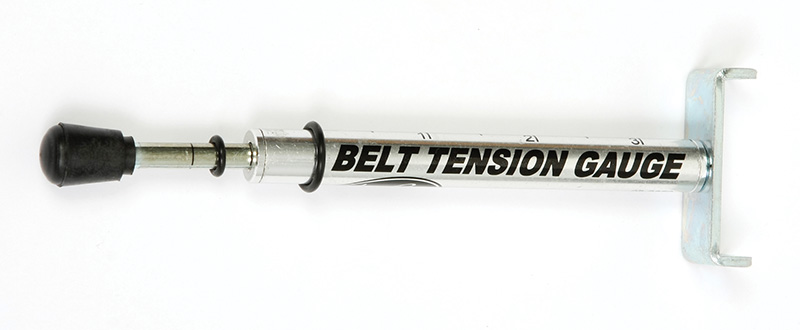
Push upward perpendicularly on the belt and visually inspect the amount of movement through the viewing window on the belt guard. Release the belt and rotate the rear tire 180 degrees and repeat the process. The amount of upward movement on the belt should match the first. If there is a “tight spot” in the belt as you are inspecting, that is where you would base your measurement for adjustment purposes.
How to Maintain and When to Replace
The good news here is you don’t need to lube a belt. If there is road debris embedded in your bikes belt, don’t try to pry it out yourself. A dealership can make an informed decision on when to replace the belt if necessary. It is ok to spray your belt and pulleys with water during a normal bike wash. You can scrub the pulleys only if they are excessively dirty, but don’t scrub the belt.
Your belt could very well be that noise gremlin you’ve been chasing for a week. A whirring noise can indicate a belt that is too tight, whereas a clicking noise can indicate a belt that is too loose. Listen carefully!
If there is any sign of tearing or dry rot (very rare) on the belt during your visual inspection, replace the belt immediately. If your pulley teeth show significant wear, replace immediately. Always replace belt and pulleys together; never replace one or the other. This type of final drive should last for upwards of 50,000 miles if properly maintained. Following normal service intervals will also prevent costly repairs, as your local dealership will keep an eye on your belt and pulley.
You might want to inspect and wash your belt if you live or ride on dirt roads often.
Shaft Drive
If your bike is equipped with a shaft drive, you have the easiest drive to maintain. Most shaft-driven motorcycles simply require a fluid replacement, cleaning, and lube at an interval of no less than 6,000 miles—often it is less frequent than this.
Regardless of what kind of final drive your motorcycle is equipped with, keeping up with regular maintenance will save you money and potential problems when you can least afford it.
Related Articles
8 Steps to Prep Your Motorcycle for Winter Storage
How to Maintain Your Motorcycles Air Filter
All Tech Articles on WRN