We love to ride our motorcycles. We want to do everything we can to make sure our bikes last a long time without mechanical failure. One of the most important motorcycle maintenance services you can do yourself is changing the engine oil and filter.
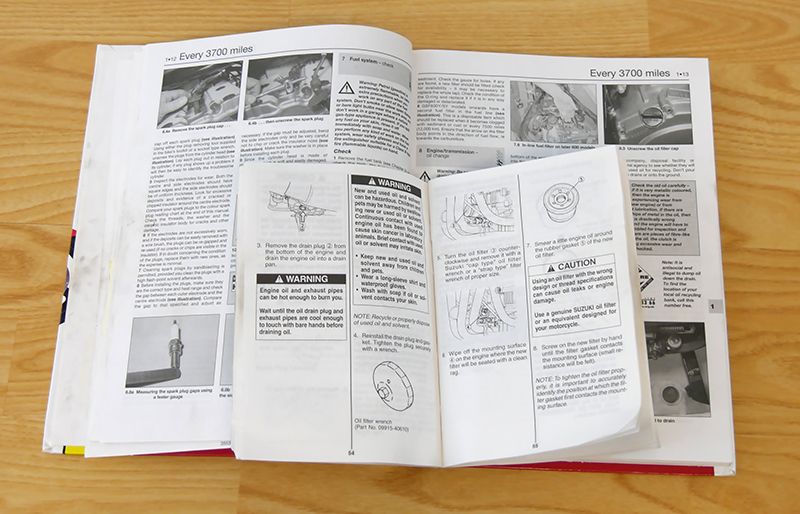
Just like cars, motorcycles rely on regular fluid changes in order to prevent contamination and damage. Changing the oil and filter is easy, and the steps on how to do it are usually included in your motorcycle owner’s manual (M.O.M.).Check with M.O.M. or a service manual for recommended oil and filter change intervals. It’s usually between 2,500 and 5,000 miles.
Even if your manual suggests installing a new oil filter every other oil change, swapping both the oil and filter every time you do the service is an inexpensive way to safeguard your bike’s internal parts. And like cars, certain conditions may call for more frequent oil and filter changes. If you do a lot of short trips, ride in a lot of stop-and-go traffic, or ride where it’s dusty and dirty you’ll want to change the oil sooner than later.
Changing your motorcycle’s oil and filter is easy and you only need a few tools to do it like a pro. You can save money by doing it yourself but, even better, working on your own bike is personally gratifying.
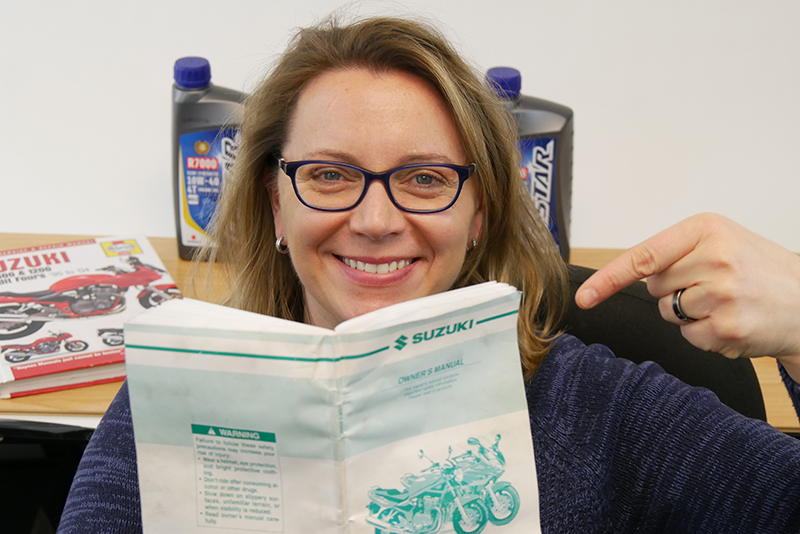
Here I’ll show you how easy it is to change your oil and filter using my 2001 Suzuki Bandit 1200S. Consult with M.O.M., but the steps are pretty much the same for any motorcycle.
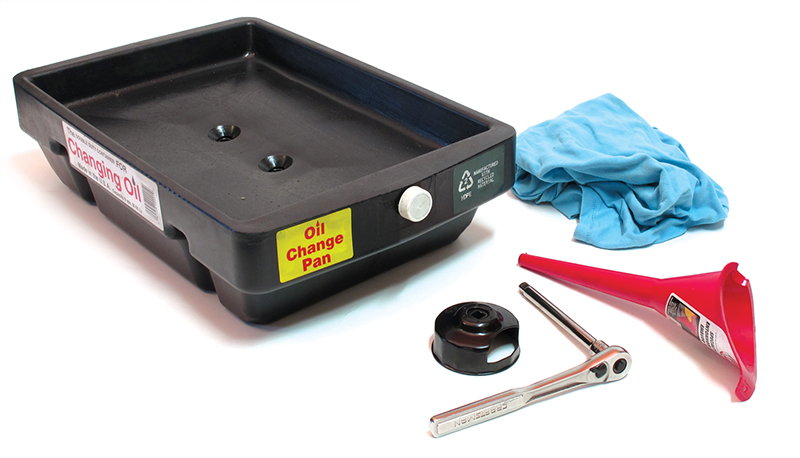
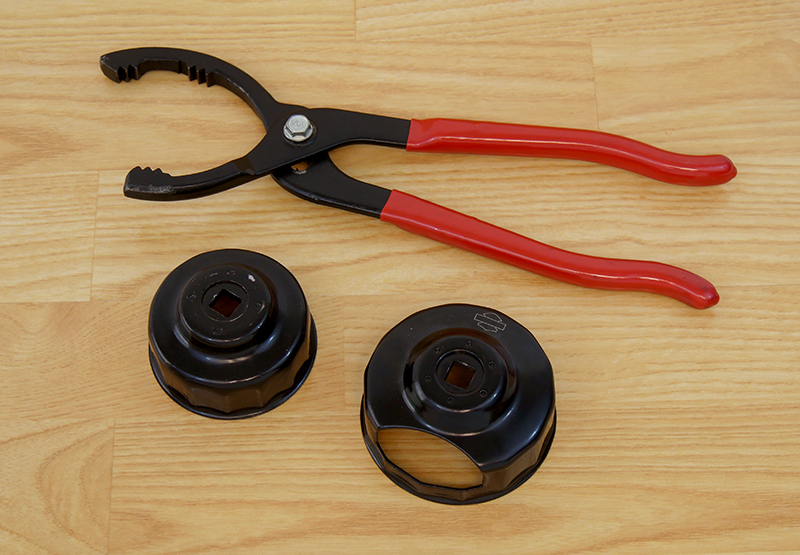
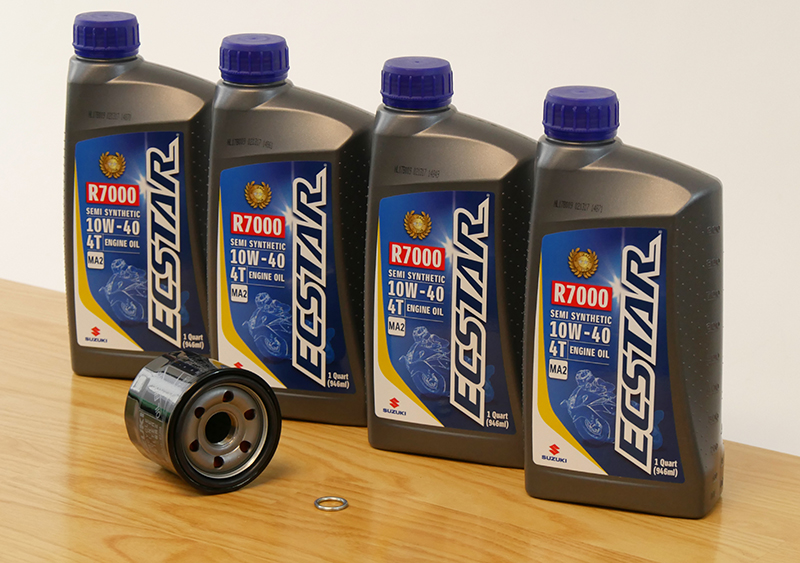
Investing in a few basic supplies you will use every time you change your motorcycle oil and filter shouldn’t put you out more than about $25 or $30 unless your bike requires special tools. An oil change pan, filter wrench, funnel, rags, and a couple hand tools is all it takes.There are several different kinds and sizes of oil filter wrenches. Make sure you have one that will work for your motorcycle before starting this project.You can get OEM or aftermarket oil and filters from your local dealership. Check with M.O.M. about what kind of oil you should put in your motorcycle or ask your dealer service rep. Don’t forget to get a drain plug gasket or crush washer if your bike requires one.
If you have a bike lift or a center stand, this job will be a lot easier. If you don’t, you can still perform the maintenance, but you’ll be crouching down on the floor and your drain pan will need to be shallow enough to slide under the bike while giving you access to the drain plug.
Warm the bike up for a few minutes before performing the oil change. Oil flows more freely when it’s warm. Don’t let it get too hot though, or you can burn yourself.
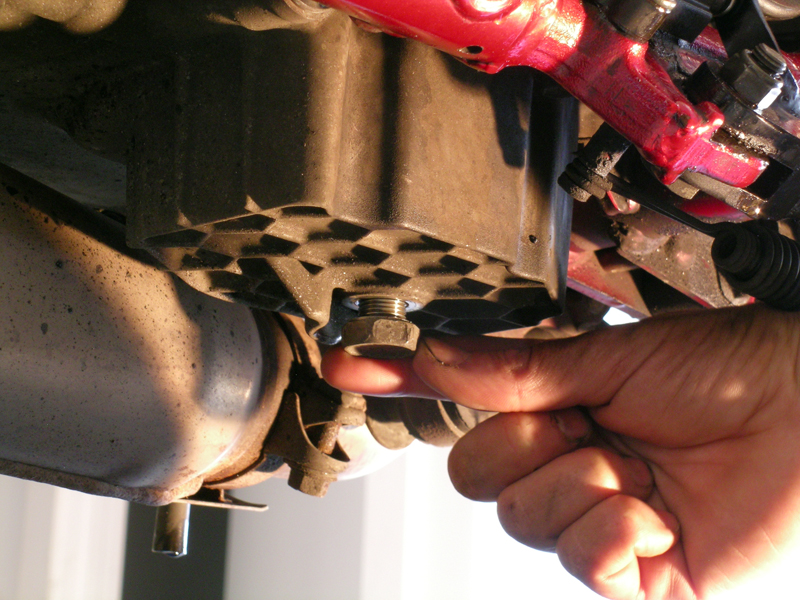
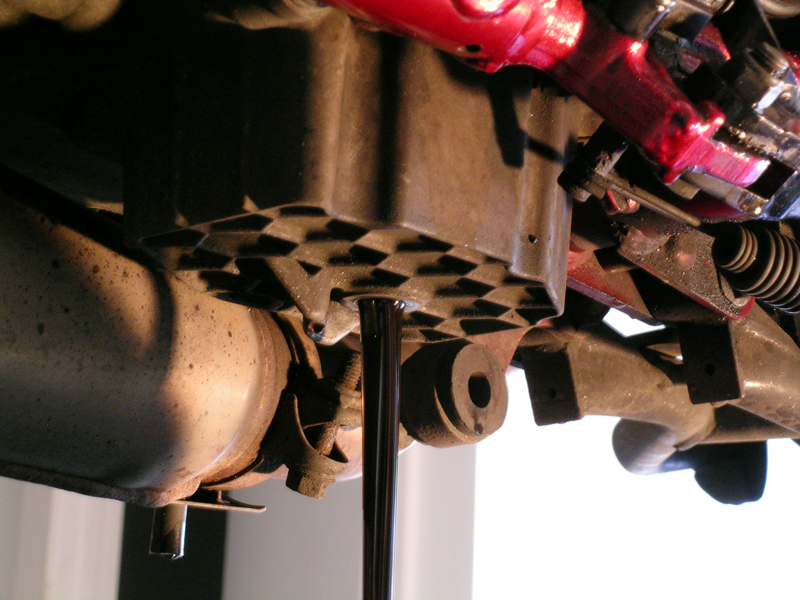
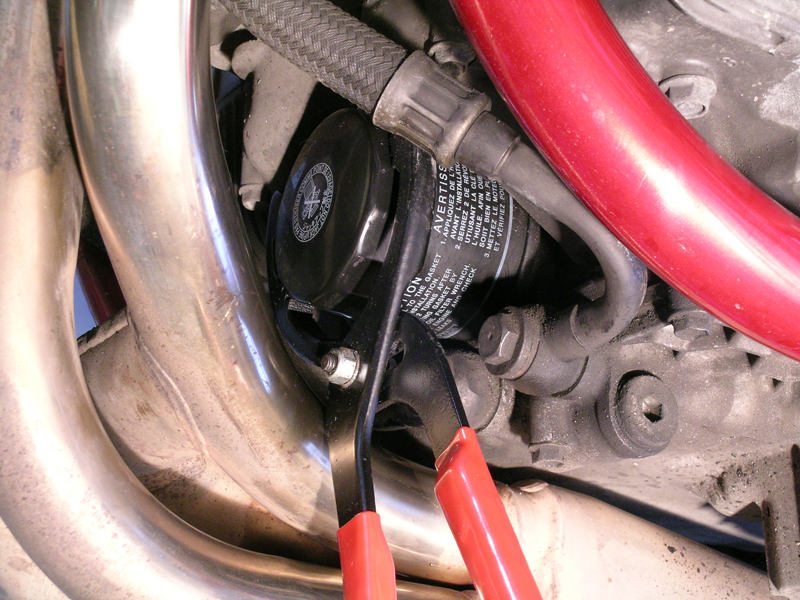
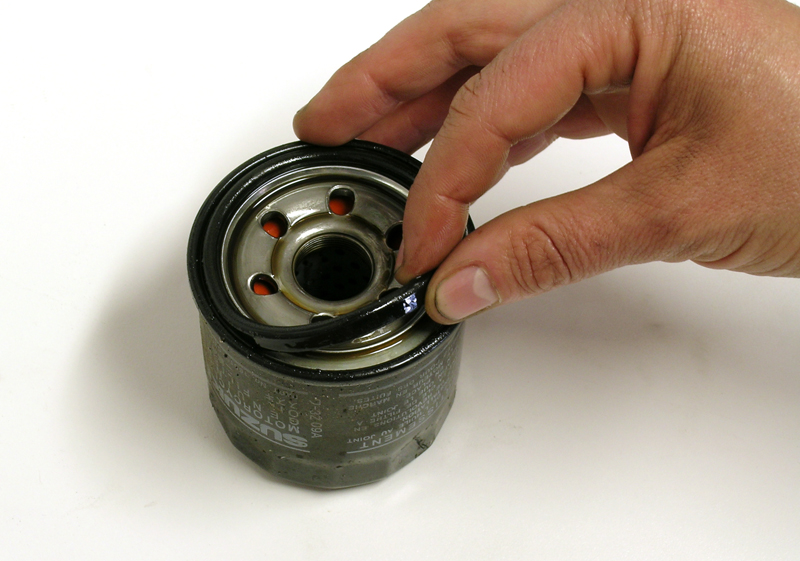
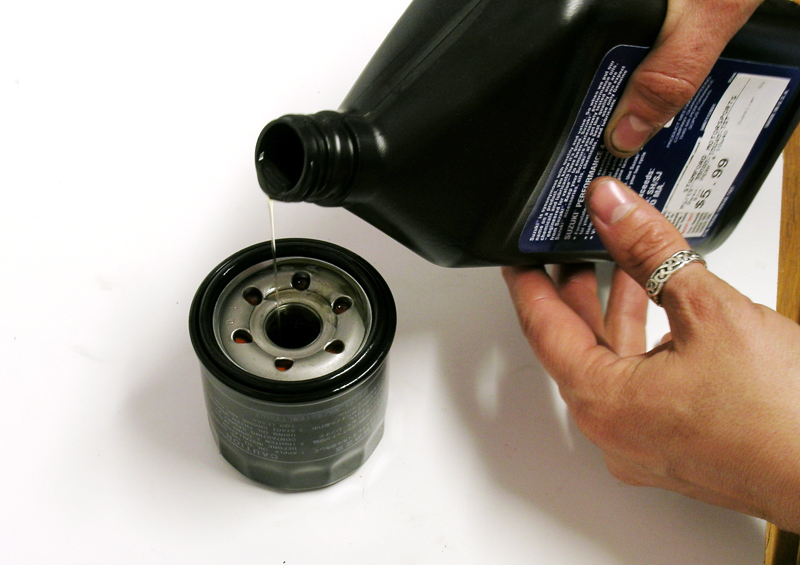
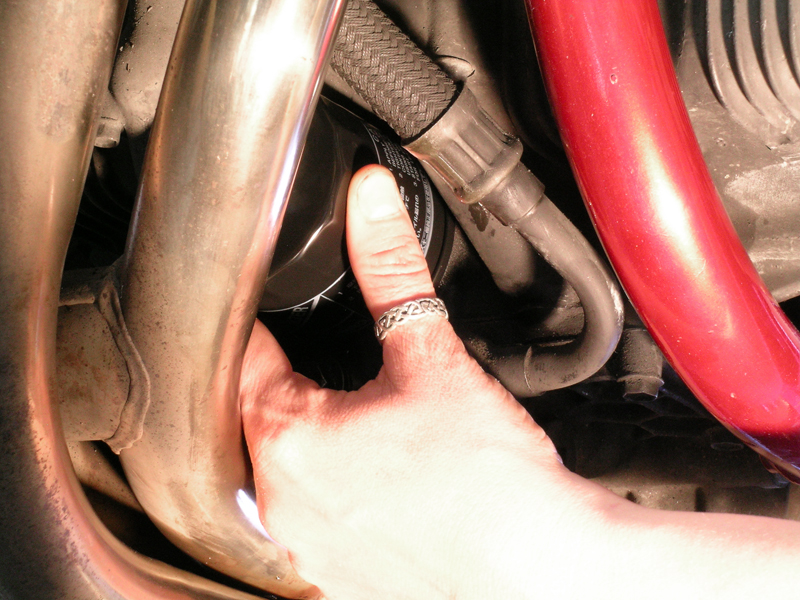
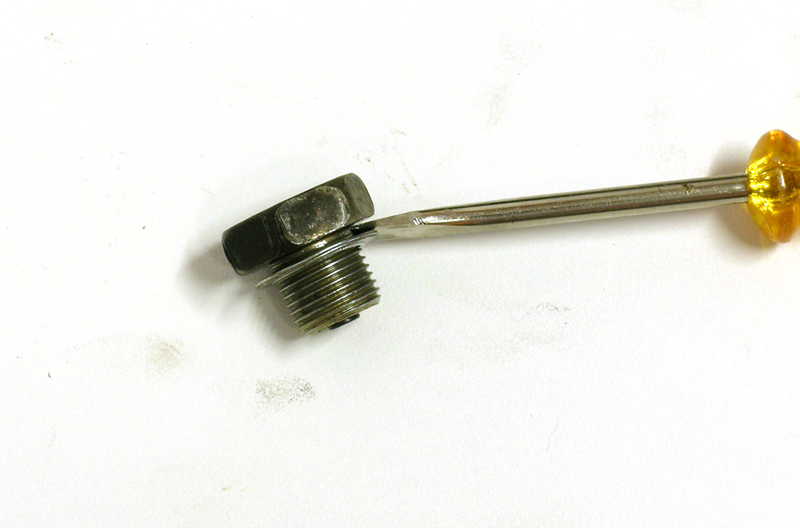
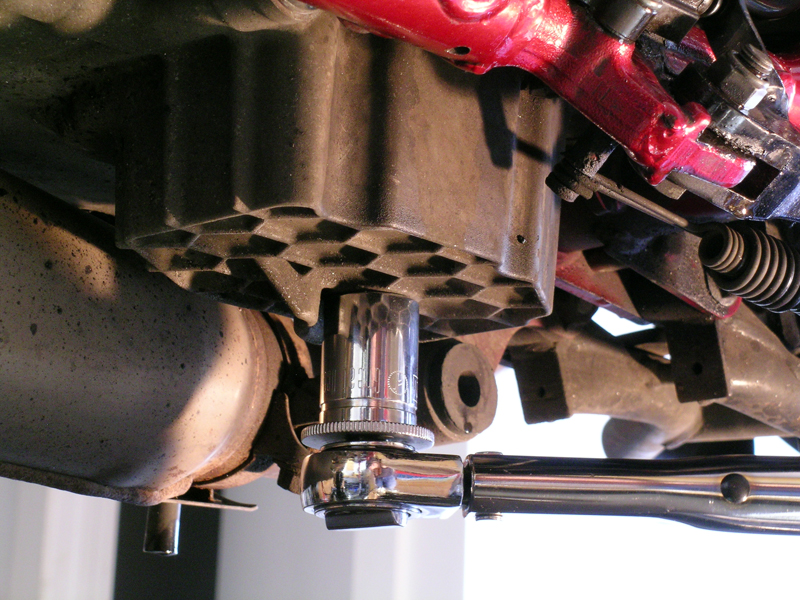
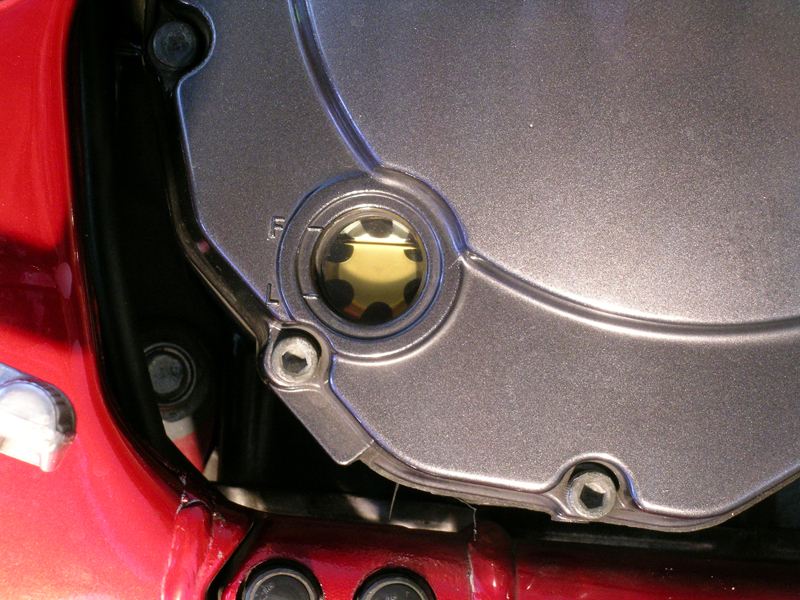
Locate the oil drain plug and put a drain pan underneath it. Then use a wrench to loosen the plug. Once the drain plug is loose, I like to unscrew it with my fingers. This way, when the oil starts rushing out, I can quickly get the plug out of the way. Things can get messy really fast here. That’s why I always keep a rag or two handy.At this point I unscrew the oil filler cap (thats where you add the fresh oil) to relieve the back pressure so the oil flows more quickly. Yuck! Look how dirty that oil is!Now locate your oil filter and remove it. I always think of “righty-tighty, lefty-loosey.” Be prepared for dirty oil to start dripping from this location too.Make sure your oil filter gasket came off with the filter. If it didn’t, you need to remove it from the engine.Prepare the new oil filter by filling it half-way with fresh oil and swirling it around to wet the internal filter element. Then use a small amount to coat the gasket.Install the new filter. Hand-tighten it until you can’t turn it anymore, then use your filter wrench to turn it another 30 degrees.My Bandit uses a crush washer on the drain plug that creates a seal when I reinstall the plug. I need to remove the old washer and install a new one on the plug before reinstalling it.When the oil is through draining, I use a torque wrench and socket to make sure I tighten it to the correct spec. Caution: be careful not to overtighten the filter or drain plug.Add the proper amount of oil. There are many different kinds of funnels you can buy that makes this job neat and easy.My Bandit has a window that shows my engine oil level. Your bike may have a dipstick. Check with M.O.M. if you aren’t sure how to check your motorcycle’s oil level.
Finally, once everything is tightened up, run the motorcycle for a few minutes, keeping an eye on the ground beneath the drain plug and filter to make sure there are no leaks. Do one last check of the oil level after the bike’s been warmed up then turned off for a few minutes.
Remember that you can’t just dump dirty oil down the drain. I always use the containers from the new oil to put the old oil in. Then I bring them, along with the oil filter, to my local hazardous waste dump. You can also ask your local dealer if they will accept your used oil. If you purchased your oil and filter from them, they should be more than willing to accept the waste.
Let us know in the comments below if you have any handy tips for changing your motorcycle’s oil or another DIY tip. We love to hear from all our readers who are taking charge of their own motorcycle maintenance.

Thanks! You break it down well and make it look very doable!
I really appreciate this topic of how to change the oil on the motorcycle. I can do many tasks on a vehicle but not motorcycle.