When temperatures rise, I want to roll my motorcycle out of the garage and go for a long ride. Then I remind myself that cruising off without giving my bike a mechanical check-up isnt safe.
“Some very experienced riders crash on their first times out because they didnt do the necessary bike preparation,” says Tim Bernard, owner of HappyTrails Motorcycle Products, a Boise, Idaho-based motorcycle accessories and service business.
It isnt difficult to give your bike the basic maintenance it needs after winter storage or at least spot problems that require attention. This will keep you from riding off and becoming stranded somewhere if your bike breaks down or in a hospital if it goes down. If something needs attention and the motorcycle is ride-able, take it to directly to your repair shop and tell your mechanic what you see. Before starting the checkup, have your owners manual handy and then follow these steps provided by Happy Trails.
1. Clean the bike. Even if your bike was stored clean, washing it is a good idea because you become “intimate” with it and may spot defects, says Tim Bernard. “Washing it allows you to see the problems.”
2. Check your battery and recharge it if needed. You can check the charge using a voltmeter, purchased for around $25 at any electronics store or motorcycle accessories outlet. Its used to measure the open circuit – meaning no connections of a battery. Put the meters plus lead on the batterys plus terminal and the minus lead on the batterys minus terminal to read the voltage. Generally, a voltmeter reading 12.8 volts for a conventional battery, and 13.2 volts for a maintenance-free battery indicates its fully charged.
A reading below those numbers, but above 11 volts indicates a battery that needs to be recharged. A reading below 11 volts generally means a battery that needs to be replaced, but it might respond when recharged.
If the battery uses distilled water, make sure the water is at required levels. Always use distilled water to refill the battery. Medicine droppers are handy for this.
3. Check engine oil levels. Having insufficient oil can cause major problems, so look in the oil reservoir sight glass to make sure the level is adequate. Change your oil and filter at least once a season, or every six months if you ride year-round. Draining and changing your oil and filter is messy but not difficult. Find out in your manual which filter and oil to buy in advance.
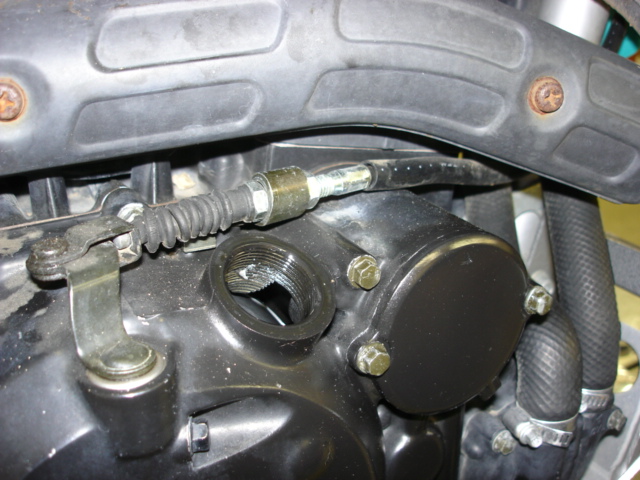
If you want to change the oil yourself, there are good books that explain how, including “How To Change the Oil on a Twin Cam Motorcycle,” by JamesRussellPublishing.com. Many riders prefer their dealer to change the oil. The beginning of the riding season is a good time to get that done including a tune-up.
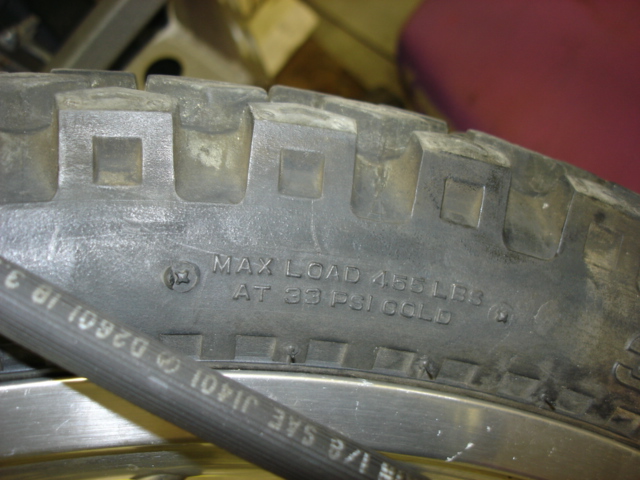
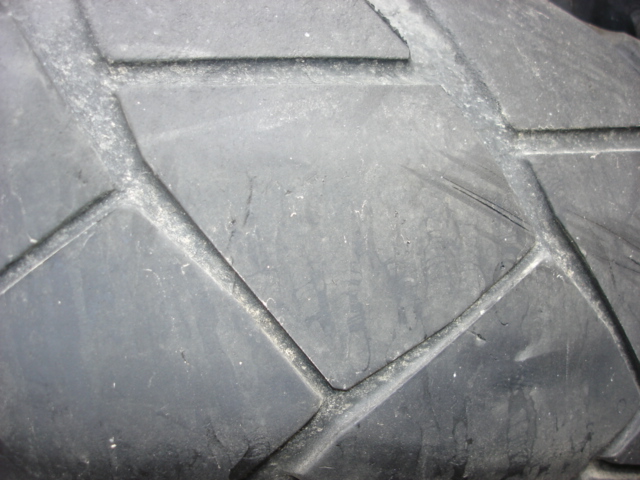
4. Examine your tires. Replace if the tread is less than 2 mm thick or if you have dry cracks and noticeable damage. Check tire pressure and add air if its below the manufacturers recommended level, which typically is printed on the sidewall of the tire. This is is very important. Many accidents are caused because of low tire pressure.
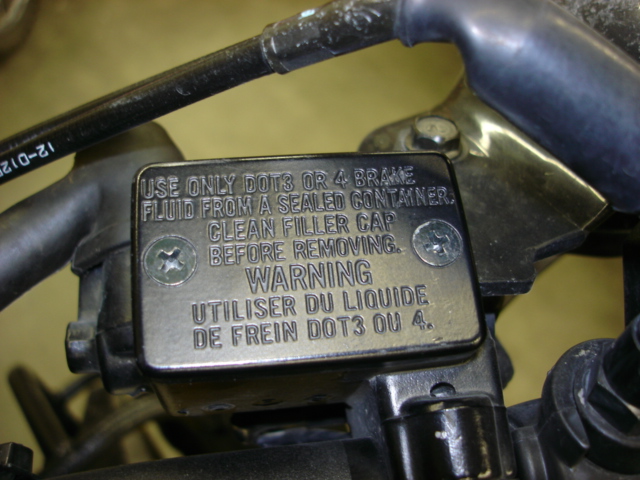
5. Check brake fluid levels. Look at the sight glass in the reservoir on your handle bar for the front brakes and the sight glass on the side of your bike for the back brakes to see if the fluid is at desired levels. Brake fluid should look clear and clean. Brake fluid thats brownish or looks like weak coffee is burned, reducing braking efficiency, and should be replaced, says John Cole, a mechanic at Happy Trails.
6. Check your coolant level if your bike is liquid-cooled. The expansion tank next to your radiator has high and low level marks that tell you if more antifreeze is required. Check for cracked radiator hoses, which should be replaced.
7. Change the air filter. This should be done at least once a year for street riders and more often for dirt and dual-sport bikes. Clean your air filter if you have the foam reusable type. Again, if you unsure how to do this, we recommend you have your dealer look into it.
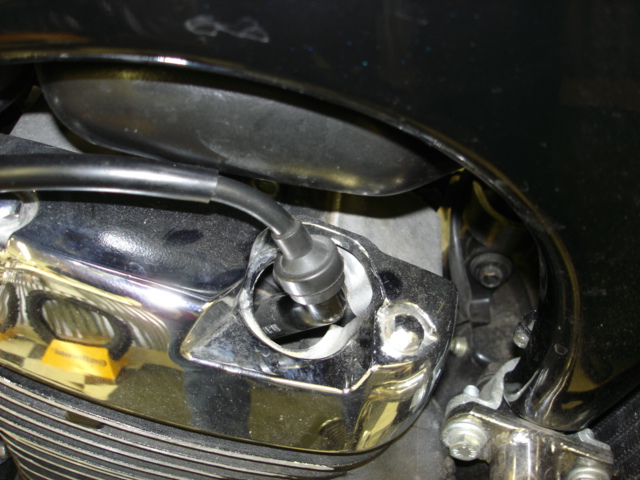
8. Change spark plugs and check connections for cracks. The caps should be solid and fit tightly. For technically challenged riders, leave this up to your mechanic.
9. Check to ensure your headlight, brake light and turn signals are working and that auxiliary electrical connections are tight.
10. Check the chains tension and oil the chain. If your bike is belt-driven, examine the belt for damage. A shaft-driven bike may need more differential oil or to have this oil changed, so review the manual for instructions on how to check it.
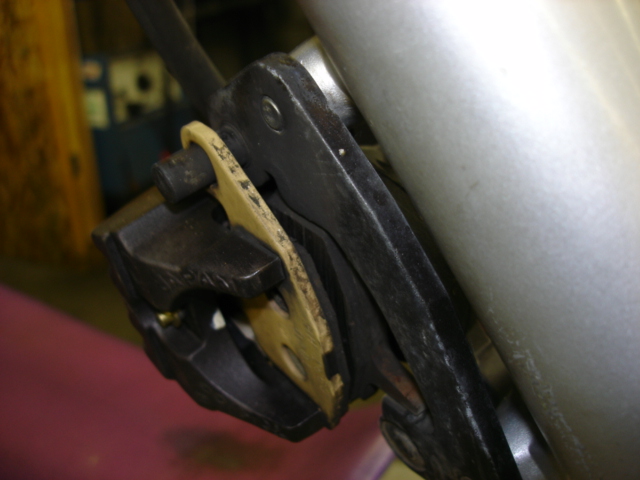
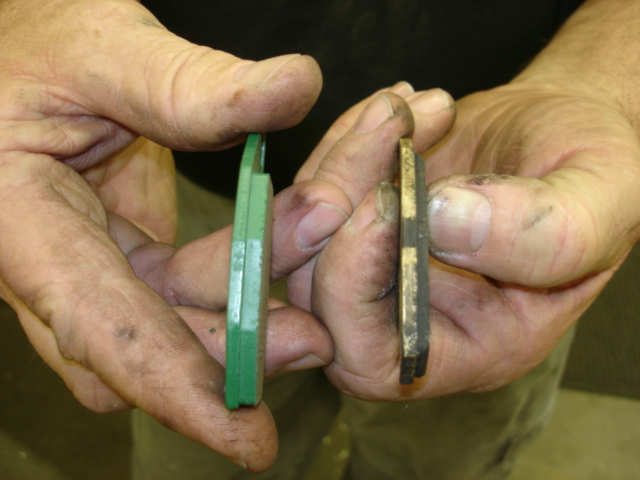
11. Check the brake pads on the front and rear wheels. Pad wear depends on your mileage and how much braking you do. An eye check will tell you whether your pads are worn and thin, and need to be replaced.
12. Check brake and throttle cables to ensure they work smoothly. Brakes should be firm and not spongy. With bike on the center stand, turn wheels to ensure brakes arent rubbing or grabbing. Check brake operation while rolling bike forward. See if the throttle lever moves smoothly and snaps back.
13. Start your engine using the choke. Let it run for a few minutes at low RPM. If the engine wont start, make sure the “kill” switch is off and the key is on to see if your lights work. If theyre dim, your battery is weak. Consider jump-starting your bike to avoid draining the battery entirely.
Even if you dont service your bike yourself, this checklist tells you what needs to be done or gets your motorcycle in shape to ride to a mechanic.
Thanks so much for the overall reminders. They are basic and very important before getting out there! Thanks for all that you do to keep us informed and safe.
Great information, easy to understand. Will forward to our Safety/Education director. This will be some very useful information at our upcoming Tech Day.
Thanks for sharing the article. Just a friendly reminder to anyone who downloads articles from our site, all articles reprinted or taken from Women Riders Now must include the WRN copyright information located at the bottom of every page on the site, as well as the link (the URL) to which it was taken from so readers can go back that link for more information. Without this, you are in violation of federal copyright laws.
Great information. I just bought my first bike from a male friend. He has been very helpfull. I am very excited. Where do I sign in for the newsletter?
On the home page in the middle is a box that directs you to sign up for our weekly E-Newsletter, or just look for the link on the left that says Get On Our Mailing List.
Awesome article. Excellent information!!
This was a wonderful article about the basics. I plan to pass this article on to several of my female riding buddies.
This will be my first year riding my BMW, and for that matter, any motorcycle beyond a parking lot. I took a small engines course when I was in high school a few years back, and some of this sounded familiar. Thanks. I will definitely keep all the tips in mind!
Good tips. You've taken care of most of the fluids on the bike except for one. If you have stored your bike for more than a couple months, I hope you put some kind of fuel stabilizer in the tank and filled the tank up to avoid water condensation. Even then, it might be a good idea to empty that gas out (can be used in your lawn mower or even car) and fill up with fresh gas.
This wasn't much of a concern years ago but with the ethenol mix in fuel these days, the gas tends to break down over time and can cause problems if not used. Don't ask me how I know this. No fun having to pay someone to clean my carbs cause my bike wasn't getting any fuel.
These tips are great and I'm sorry I didn't check to see if you did an article on this already but the important thing is to store the bike properly over the winter so when riding season starts, your baby will be ready to go after a quick check. Some spent fluids can damage critical engine parts and other bike parts over time. Go and ride smart.
Can't wait to try this myself this year. Thanks for the GREAT tips. Wish it would get warm here soon.
It is still too cold here in Iowa to get my bike out, but this article was a big help to me.
Thanks!
Those are 13 very important steps and I would like to suggest a 14th. Mentally and physically prepare yourself for the new riding season. You probably didn't sit in the garage all winter, but few of us were probably as active as in the summer time and you definitely need to be on your game mentally when riding.
Thanks for the 14th step. Smart advice. The first ride of the season should be done slowly and with caution. Among other things, be mindful of all the gravel and sand on the roads dumped there by the snow plows this past winter.
Thanks for the tips. My bike is acting funny and I am not getting any tips from long-time riders. I will use this and share it with my friends.
Extremely useful info. Thank you.
Great tips.
This is great info. I will share this information with the females in my motorcycle club. Thanks.
I thought this article was very helpful for “new” bike owners that have no clue about maintenance of their bike.
This is the first year I'll be tending to my bike on my own. In the past, I've always had someone else offer to do a spring tune-up for me, and although I've watched from the sidelines, I've never actually gotten my hands dirty. The information in the article seems fairly simple to follow. I'm sure I'll end up never “letting” anyone tune her up, as I'll look forward to getting her going every spring on my own.
Thanks for the tips. Not quite warm enough here in New England but getting close. Can't wait to get my bike out of the shed and the battery off the tender.